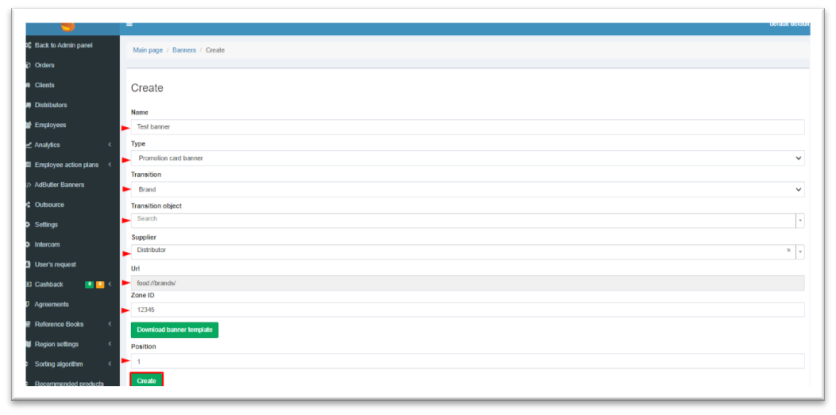
Setting up banner transitions
This example considers setting up transitions for the Banner of the promotion card, which runs similarly with other types.
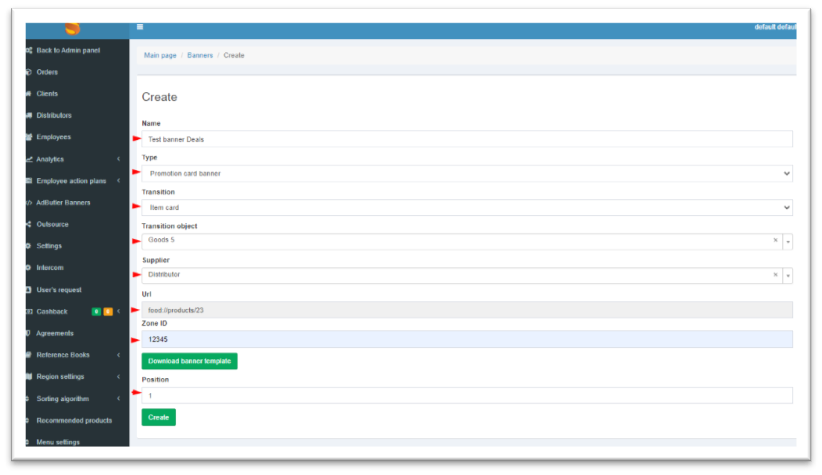
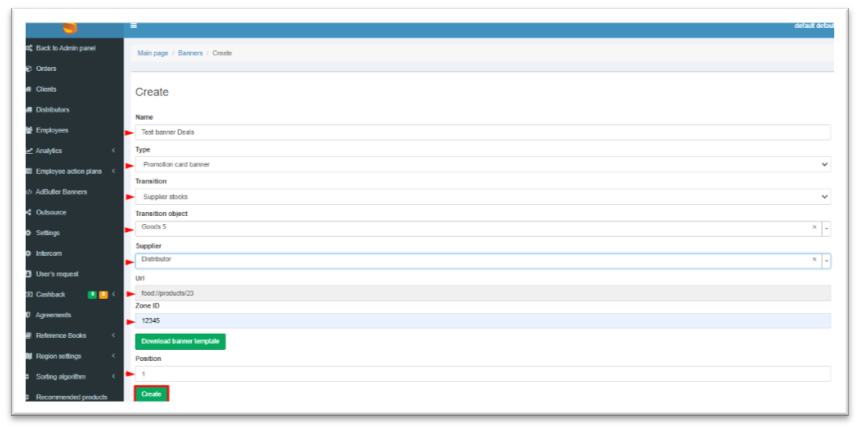
Transition to the product card
When choosing this type of transition, it is necessary to select the product in the catalog to which the user will be transferred after clicking on the banner. When filling out the form, it is required to:
After setting up, click on the Create button.
Transition to the promotion card
When choosing this transition type, you need to select the promotion to which the user will be transferred after clicking on the banner. When filling out the form, it is required to:
After setting up, click on the Create button.
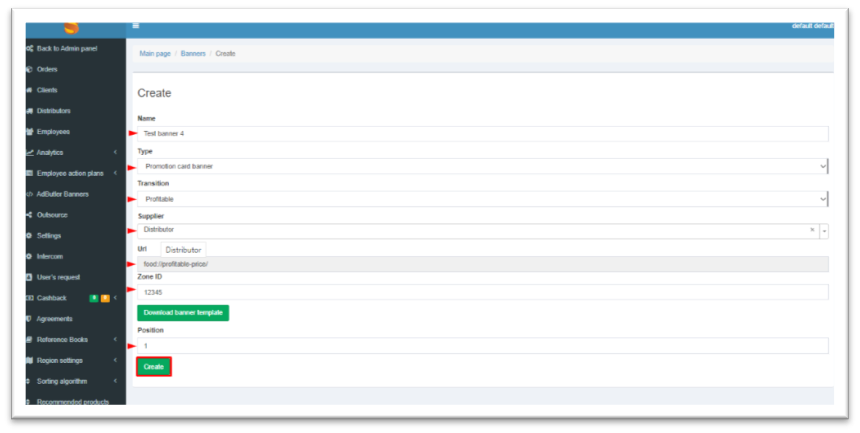
Transition to the supplier's promotions section
When choosing this type of transition, it is necessary to select a supplier to whose promotions section the user will be transferred after clicking on the banner. When filling out the form, it is required to:
After setting up, click on the Create button.
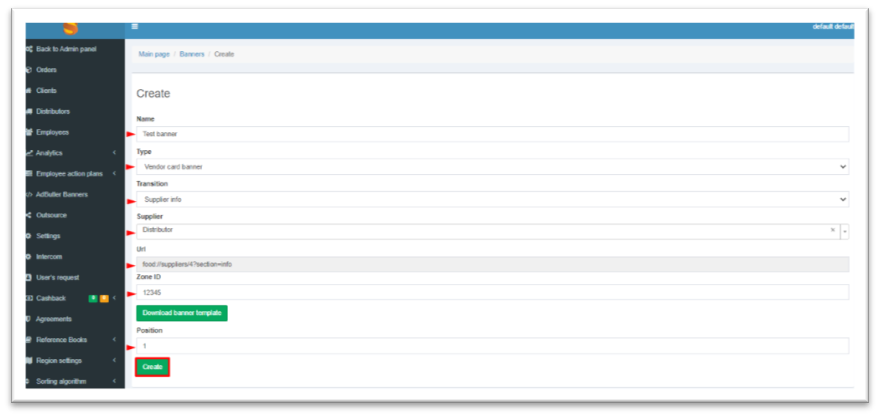
Transition to the supplier information section
When choosing this type of transition, it is necessary to select the supplier to whose section the user will be transferred after clicking on the banner. When filling out the form, it is required to:
After setting up, click on the Create button.
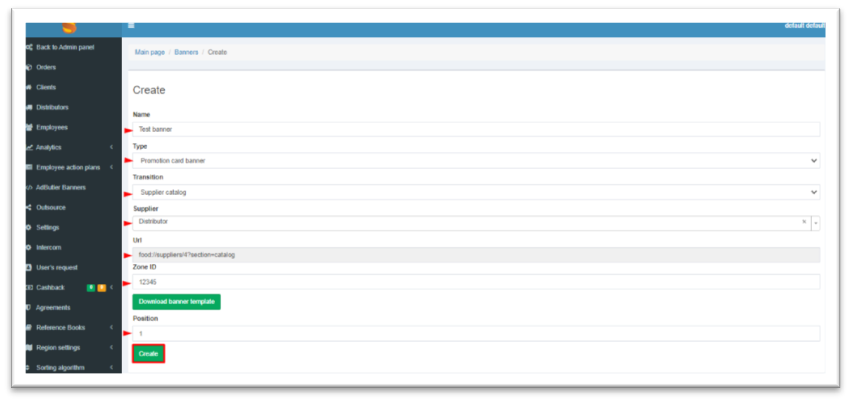
Transition to the supplier's catalog
When choosing this type of transition, you need to select the supplier to whose catalog the user will be transferred after clicking on the banner. When filling out the form, it is required to:
After setting up, click on the Create button.
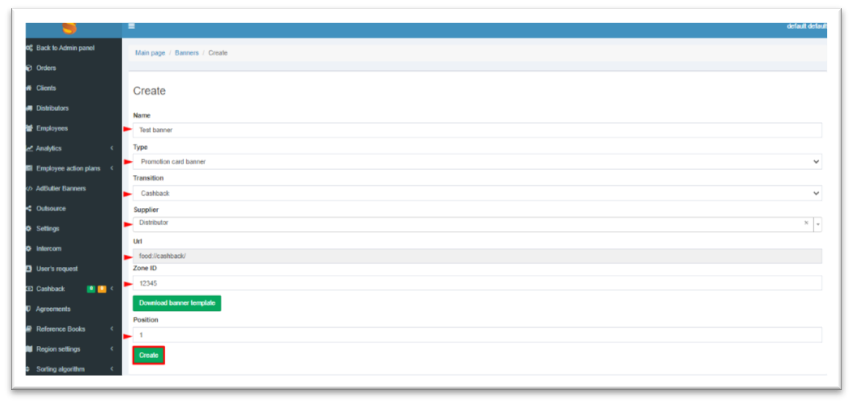
Transition to the Cashback section
When selecting this type of transition, the user will be transferred to the "Cashback" section. When filling out the form, it is required to:
After setting up, click on the Create button.
Transition to the catalog of products of a certain brand
When selecting this type of transition, the user will be transferred to the list of products of the specified brand. When filling out the form, it is required to:
After setting up, click on the Create button.
Setting up advertising campaigns on the side of the Adbutler service
On the side of the Adbutler service, it is possible to create a publisher and zones for placing advertising banners, as well as advertisers with the possibility of creating an advertising campaign in the form of banners. When setting up ad campaigns in Adbutler, you can configure the priorities of banner impressions and specify the transition point when clicking on the banner.
In addition, on the service side, there is a restriction of banner display by:
- a time interval with a choice of dates;
- a time interval with a choice of dates and the ability to enter a quota for the number of views/clicks;
- the number of impressions per user in the selected number of days;
- number of impressions or clicks per day.
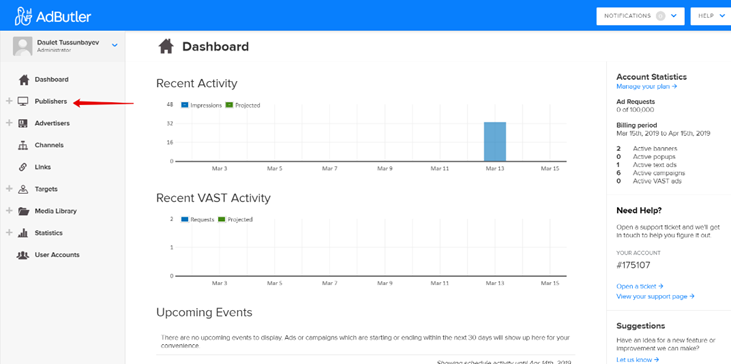
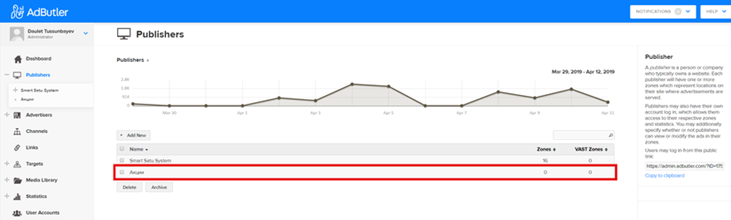
Creating a Publisher
Go to the publisher section by clicking the Publisher button on the left navigation panel.
A publisher is a website or application where you place ads. In a narrower sense, these will be banner placement sections: Promotions, Product Catalog, Supplier Catalog and Welcome Banner.
In this section, you can create a new publisher by clicking on the Add New button, or edit an existing one.
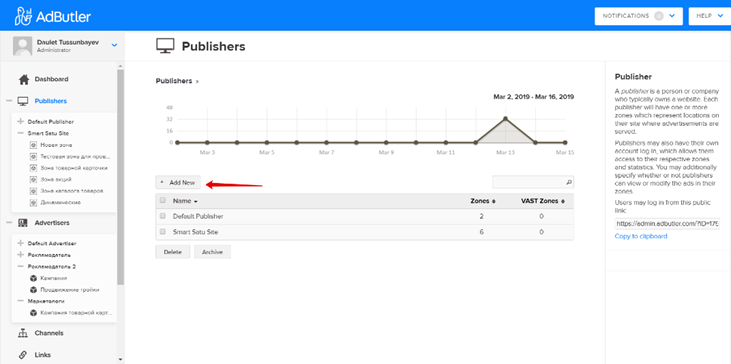
When creating a new publisher, you need to set a name (for example, Promotions) and save the changes with the Create Publisher button.
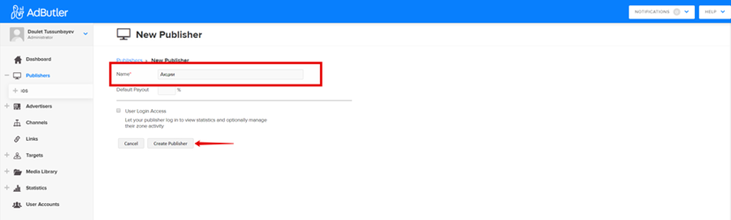
The created publisher will be in the list of the Publisher section.
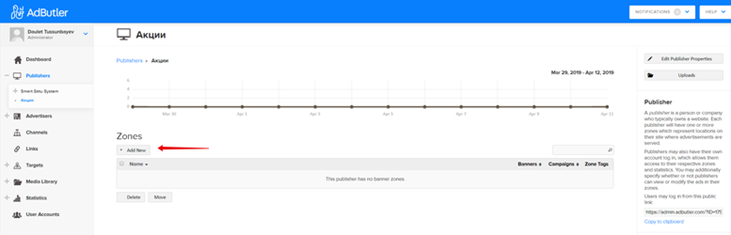
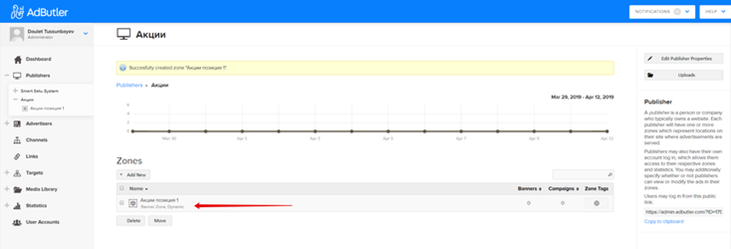
Creating a zone where banners will be displayed
Click on the desired publisher, in this case - Promotions.
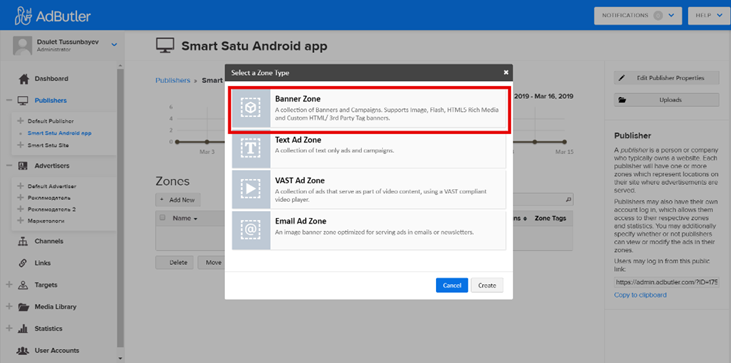
After that, all the zones that currently exist for this publisher will be shown. To create a new zone, click the Add New button and select the zone type in the opening dialog box.
The zone represents the space (cell) on the publisher's website or application where the advertisement will be placed. The most optimal approach to zone management is to create one zone for each advertising space on the website, in the publisher's application. For example, Promotions position 1, Promotions position 2, Welcome Banner, etc.
Then advertising campaigns can be linked to each zone. Advertising campaigns information is provided below.
Of all the options offered, we only need banners. So, you should choose the Banner zone.
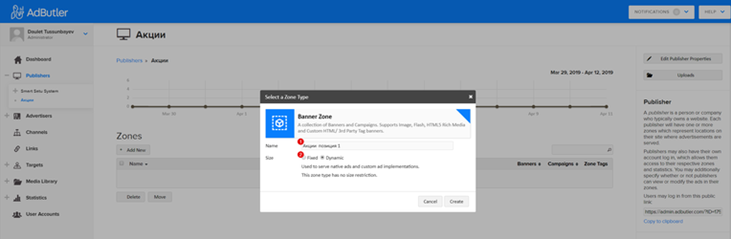
- Set a name for the zone (Product Catalog).
- Choose the banner size: Static or Dynamic.
- Click on the Create button.
It is recommended to choose a Dynamic zone size. Thus, banners of any size can be linked to one zone.
When you go to the created zone, the available options will be displayed. Banner loading is possible directly for this zone.
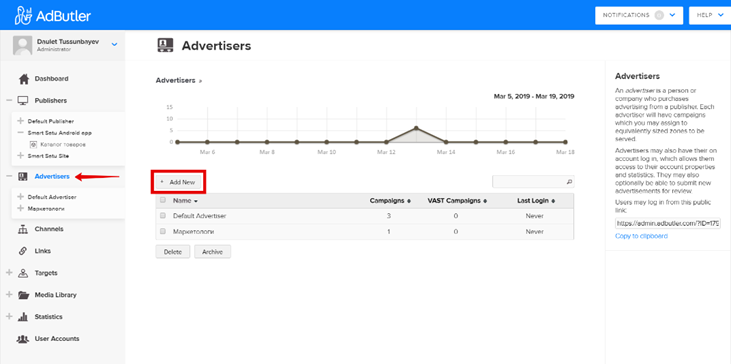
Creating an Advertiser
Go to the advertiser section by clicking Advertisers on the left navigation panel. In this section, you can create a new advertiser by clicking on the Add New button, or edit an existing one.
The advertiser is a company that has paid for advertising services in the Smart Satu system. It is recommended to create separate advertisers for better collection of statistical data.
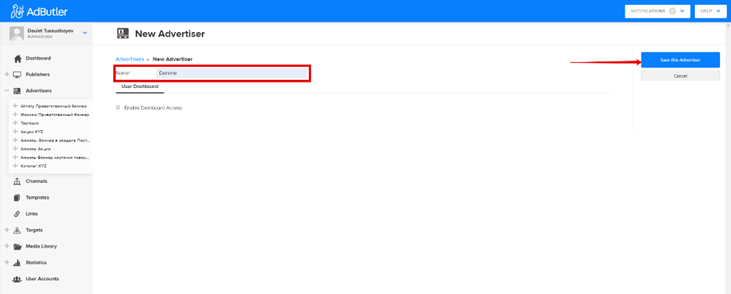
Next, you need to set the advertiser's name (Danone) and save the changes with the Save this Advertiser button.
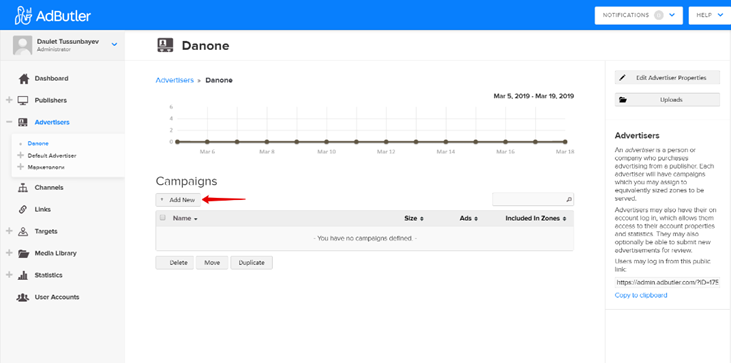
Creating an advertiser's advertising campaign
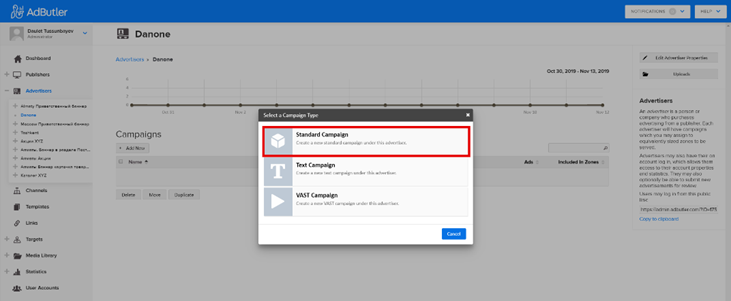
After saving, the advertiser is displayed in the general list. To create/modify an advertising campaign, you need to select the right advertiser. To create a new campaign, click on the Add New button.
Advertising campaigns are intended to place one or more banners of the same size within a single advertiser. The campaign data must be linked to the publication zone. At the same time, different display details can be configured for each campaign banner.
Select the type of advertising campaign - Standart Campaign.
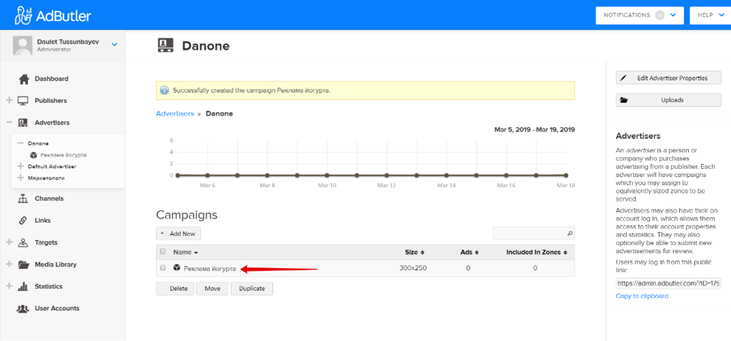
Next:
- Set the Name of the advertising campaign.
- Save.


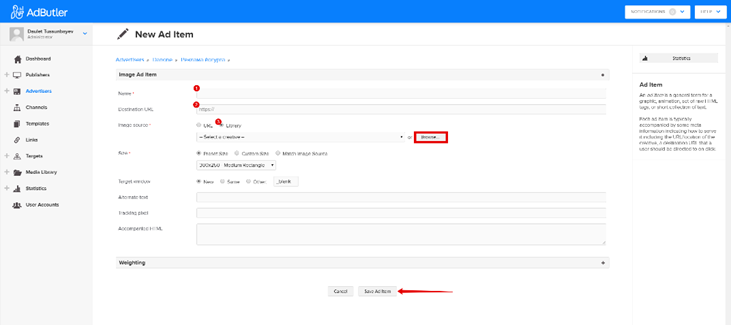
Creating a banner.
Within the advertising campaign, it is possible to add/correct banners and link them to already created banner zones
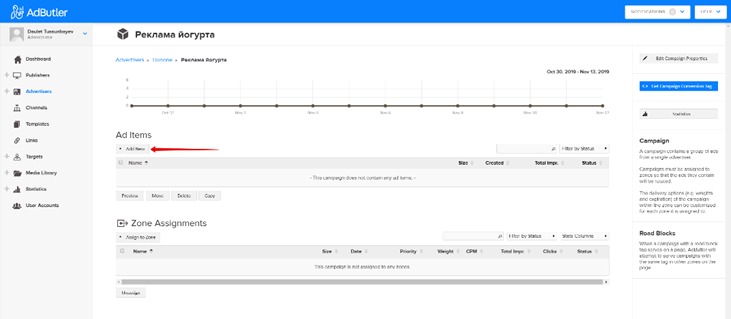
Next, you need to select the type of banner - Image.
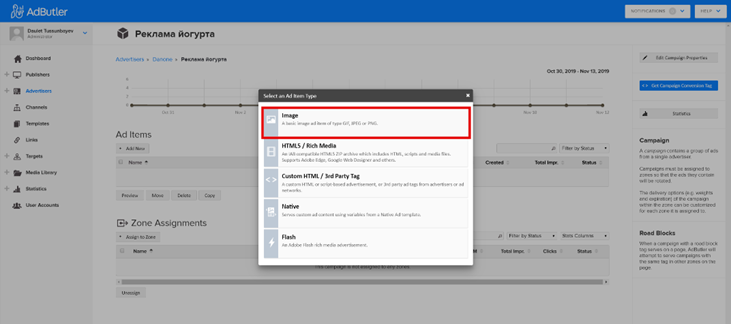
Complete the creation with the Save Ad Item button.
For the most optimal display of advertising banners on the screens of various devices, it is strongly recommended to create banners of the following sizes by type:
Welcome - 1092 x 2354;
Promotions - 1242 x 566;
Supplier catalog - 1170 x 231;
The product catalog is 1242 x 378.
At the same time, the informative part of the banner should be placed in the central part, because the banner on the screens of devices with a lower resolution will be cut in width. The height of the banner does not change.
For more information, follow the link: Advertising Manifesto (Banners)
Also, within the same campaign, you can create several banners that will simultaneously participate in the campaign, according to the set priorities, or you can set up different periods of banner display by date.
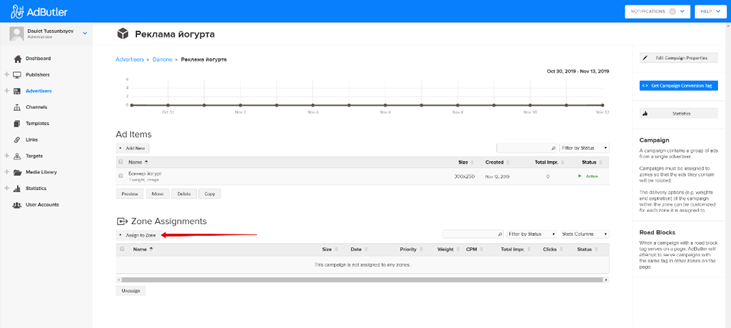
After creating the banner, the advertising campaign must be linked to the publisher's zone that has already been created.
To do this, click on the Assign to Zone button.
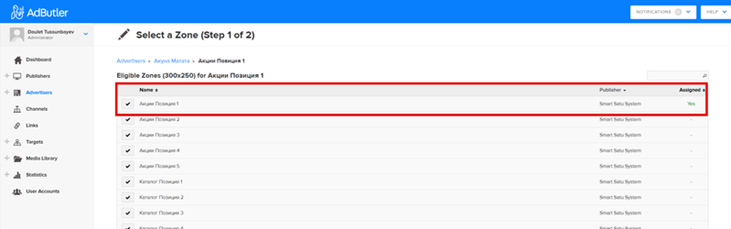
Select the desired linking zone.
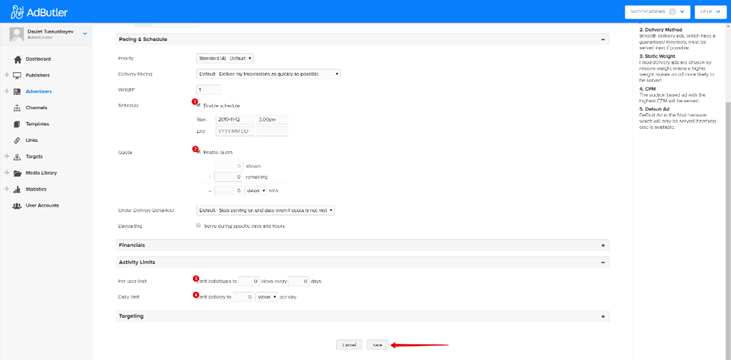
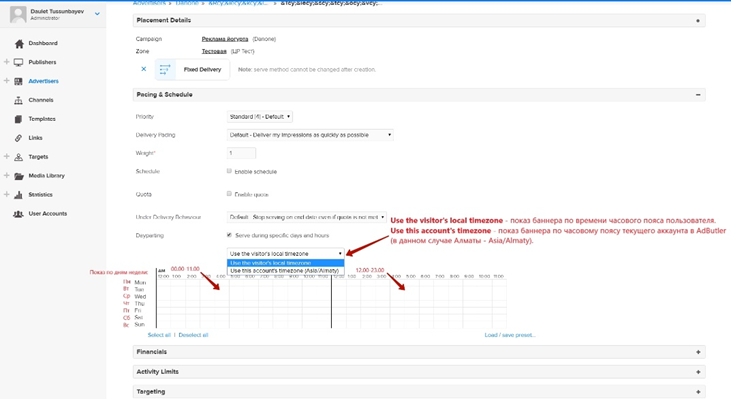
Select Fixed Delivery.
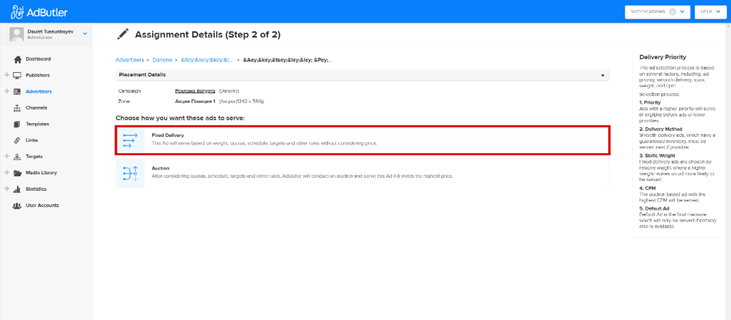
Specify the settings for displaying the advertising campaign:
- In the Schedule field, check the Enable schedule box and specify the banner display period
- In the Quota field, check Enable Quota, you can limit the total number of impressions/clicks for this banner.
- In the Per user limit field, you can set a limit on the number of banner impressions per user for a certain period in days.
- In the Daily limits field, you can set a daily limit on the number of banner impressions/clicks per user per day.
Save changes with the Save button.
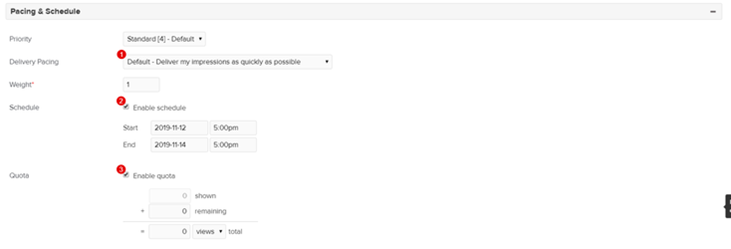
Depending on the requirements, you can set up an advertising campaign in the following order:
- Leave Delivery Pacing as default;
- Leave Schedule without the display period;
- Leave Quota unchanged.
Thus, a campaign will be created, the settings of which provide for the display of the banner without time limits and impressions/clicks.

Another setting option:
- Leave Delivery Pacing as default;
- Schedule set the start and end date of the campaign;
- Set the limit of impressions/clicks Quota to Enable Quota and specify the numerical limit of impressions/clicks.
In this case, a campaign will be created, which will have a time limit on conducting and a set limit on impressions/clicks. However, AdButler will not evenly distribute the banner placement by days within the duration of the event and will cease to be displayed when the set limit is reached.
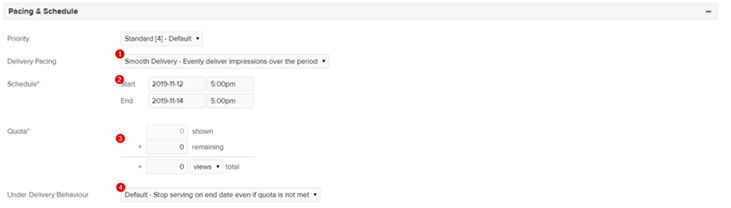
You can also set up an equal distribution of banner displays during the duration of the advertising campaign:
- Select Smooth Delivery in the Delivery Pacing field.
- Set the start and end date of the campaign;
- Set Enable quota - limit of impressions/clicks
- UnderDelivery Behavior select an action to reach the end of the campaign period: end the campaign when the quota is reached (by default) or continue the campaign at the end of the campaign period until the set quota is reached.
For example, if a Supplier has paid for 3,000 ad impressions within 30 days, the system will automatically distribute 100 impressions per day.
Setting up the banner display at a certain time interval during the day
You can set a specific interval for displaying the banner on days of the week and at a specific time.
The AdButler service allows you to make this configuration in two ways.
The first way:
To do this, in Targeting, you need to fill in the keywords field in the following order date:mon-tue/03-06, where:
- Register the keyword date:
- Specify the interval by days of the week (three-letter abbreviation in English)
- Specify the time period (Pacific time is indicated)
Filling in the field must contain the keyword date:. After the keyword, you must specify the days of the week in abbreviations. Be sure to put a separator / (slash) and set the display time. Important: Pacific time is indicated.
|
Eng. |
Russ. |
|
mon |
понедельник |
|
tue |
вторник |
|
wed |
среда |
|
thu |
четверг |
|
fri |
пятница |
|
sat |
суббота |
|
sun |
воскресение |
Comparative table of time zones for Alma-Ata: https://time.is/ru/compare/0000_24_Apr_2019_in_PT/ALMT Comparative table of time zones for, Example, a Welcome banner is set up for the period from 1 (Monday) to the 5th (Friday). At the same time, it is necessary that the banner is displayed daily from 14.00 to 16.00 (Almaty time). So, in Targeting, you need to fill in the keywords field, you need to enter date:mon-fri/01-03

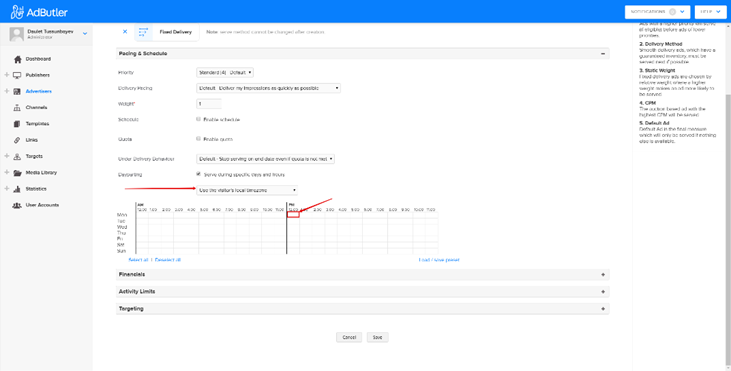
The second way:
To check the Server during specific days and hours box (Show on certain days and times).
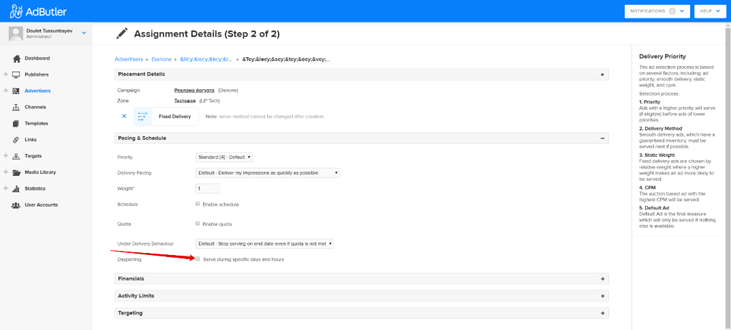
After that, the settings fields will appear, which include:
- Selecting the time setting for displaying the banner:
- by the time zone in which the user is located;
- by the time zone in which the Adbutler account is registered.
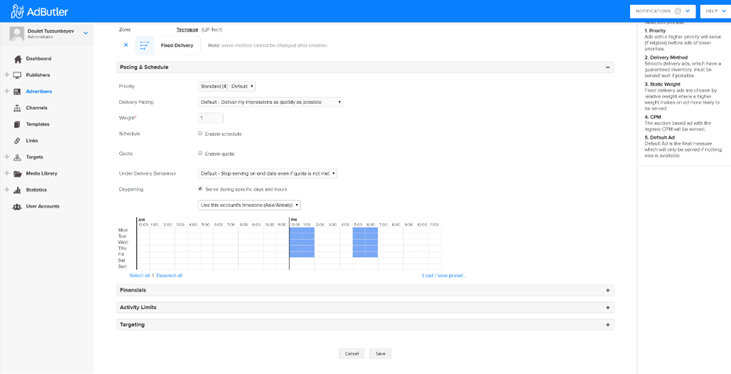
- Select the hours and days on which the banner will be displayed.
Setup example:
Select the option to display the banner by time zone:
- Use the visitor's local timezone - by the time zone in which the user is located;
- Use this account's timezone - by the time zone in which the account is registered in Adbutler.
Click on the cell with the desired time opposite the target day of the week.
About time zones
The Use the visitors local timezone setting is suitable for BC that use the Almaty BC account in AdButler. For example, this setting is suitable for displaying banners in Moscow and St. Petersburg, so as not to calculate the time difference.

According to the settings below, the banner will be displayed from Monday to Friday during the periods 12.00-13.00 and 17.00-18.00 according to the Almaty time zone.
In general, AdButler allows you to create different options for setting up an advertising campaign, depending on the requirements.
Several banners can be used in one advertising campaign. In this case, in the Priority & Weighing section, you can control the priority of displaying a campaign or banner. Priority levels can be set from 1 to 5, with 5 being the highest. Ads with a higher priority will always be shown first if there are none with a similar criterion. Banners with the same priority are displayed in random order. The priority 4 is set by default.
It is recommended to leave priority 4, because banners with a higher priority completely overlap banners with a lower one.
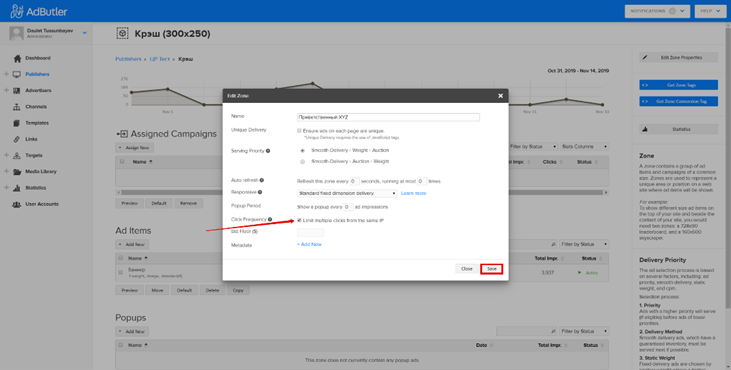
Removing the restriction on the number of clicks
To remove the restriction on the number of clicks from one IP address, it is necessary to go to the Edit Zone Properties section in the desired zone to which the campaign is linked and uncheck the Click Frequency.

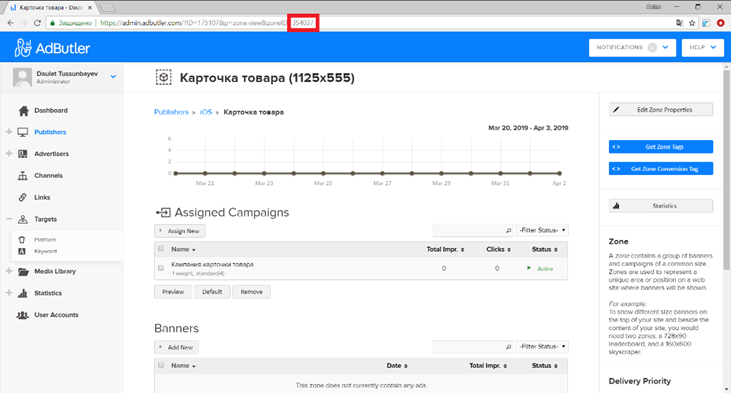
Copying the ID zone for CRM
After the advertising campaign is created, you need to copy the ID zone in the address bar in the Publishers section of the desired zone (in this case, Smart Satu Android app).
ID zones - the last digits in the address bar following ID=.

When making changes to the current advertising campaign, linking a new campaign to an already used zone does not require repeated copying of the ID, because all changes will be transmitted automatically.